How to Calculate Cost of a Product: A Woodworker's Guide
Figuring out what a custom woodworking project actually costs comes down to a simple, powerful formula: add up your materials, labor, and overhead, then divide by the number of pieces you made. At its core, Total Cost = (Direct Materials + Direct Labor + Manufacturing Overhead) / Total Units. This isn't just business school theory; it's the absolute starting point for any woodworker who wants to be profitable year after year.
The Foundation of Profitable Woodworking
Let's be real—pricing custom woodwork can feel like a shot in the dark. But tossing numbers around without a system is the fastest way to burn out and wonder where the money went. Building a woodworking business that actually lasts means you have to get serious about effective project cost estimating.
It's a mental shift. You have to move from just trying to cover your lumber bill to strategically building a business that can support you and grow.
Understanding the Three Pillars of Product Cost
True control over your pricing comes when you stop thinking in vague "cost-plus" terms. Instead of just slapping a percentage on top of your material costs, you need to deeply understand the three core pillars that hold up your total product cost. These are the financial bones of every single piece that leaves your shop.
To get started, it's helpful to see these cost components laid out clearly.
Core Components of Woodworking Product Cost
| Cost Component | Description | Examples in Woodworking |
|---|---|---|
| Direct Materials | The tangible raw goods that become part of the finished product. | Lumber, plywood, hardware (hinges, pulls), fasteners, wood glue, stains, and finishes. |
| Direct Labor | The "hands-on" time your team spends physically creating the product. | Time spent milling, cutting, joining, assembling, sanding, and applying finishes. |
| Manufacturing Overhead | All indirect costs necessary to operate your workshop but not tied to a single product. | Shop rent, utilities, tool depreciation, saw blades, sandpaper, insurance, and software subscriptions. |
This table provides a simple but effective framework for categorizing every dollar you spend.
This detailed approach is the heart of what's known as cost-based pricing. You calculate the full cost to produce something, then add a specific markup to lock in your profit.
For instance, say the total cost to build a custom cabinet—including all wood, labor, and a share of the shop's overhead—comes to $800. If you apply a 40% markup, you arrive at a selling price of $1,120. This isn't guesswork; it's a systematic method that guarantees every single job contributes to the financial health of your business.
Capturing every single expense is non-negotiable. If you forget to account for the offcuts that end up in the scrap bin, the wear and tear on your table saw blade, or the half-hour spent sweeping up, you're letting your profits slowly bleed out.
When you start breaking down your expenses into these three buckets, you're no longer guessing. You're making informed, strategic decisions. Understanding the "why" behind your numbers is the first, and most critical, step toward mastering your pricing and building a craft that truly pays.
Nailing Down Your Material Costs
Every profitable project starts with a dead-on accurate understanding of what goes into it. Think of your Bill of Materials (BOM) as more than a shopping list—it's the financial blueprint for your entire quote. If you rush this part or miss a few items, you're practically guaranteeing yourself a smaller profit margin.
To get your product cost right, you have to look past the big-ticket items like lumber and plywood. The devil is truly in the details.

Building a Comprehensive Bill of Materials
A rock-solid BOM accounts for every single physical component that gets used up during a build. This means you have to be meticulous and leave nothing to chance.
Your list should cover all these bases:
- Primary Lumber and Sheet Goods: This is the obvious one—all the solid wood and plywood called for in the plans.
- Hardware: Every hinge, drawer slide, pull, knob, and catch is a direct cost. Don't gloss over these.
- Fasteners: The small stuff adds up fast. I'm talking screws, dowels, biscuits, and even pocket hole screws.
- Consumables: These are the items you burn through in the process, like wood glue, sandpaper, stains, oils, and topcoats.
Forgetting a single set of $80 drawer slides on a cabinet quote can wipe out your profit on that unit instantly. The best way to avoid this is to use a detailed BOM template. A system like TimberCloud is perfect for this, letting you build a product catalog with all your components so you never miss a thing when putting together a quote.
The Hidden Cost of Material Waste
Alright, let's talk about the silent killer of profitability for a lot of new woodworkers: material waste. The amount of wood you buy is never the amount that ends up in the finished piece. I learned this the hard way on an early cabinet job where I calculated my board footage perfectly for the final parts but completely forgot about the waste. That one mistake cost me nearly my entire profit on the project.
Waste creeps in from a few places you just can't avoid:
- Saw Kerf: Every pass of the blade turns a sliver of wood into sawdust. A standard 1/8" table saw blade eats up a surprising amount of material over dozens of cuts.
- Offcuts: You simply can't use every square inch of a board. You'll always have small, unusable pieces left over.
- Defects: Culling out knots, cracks, and other imperfections is just part of milling lumber, and it all generates waste.
- Test Pieces and Setups: You need scrap to dial in a router bit profile or test a finish color, and that material has to be accounted for.
Failing to properly calculate and include a waste factor in your material cost isn't just an oversight; it’s like giving away your profit margin before you even start the project.
Calculating Your Waste Factor
So, how do you actually put a number to it? The most common and reliable method is to apply a waste factor percentage to your raw material figures. First, you calculate the exact board or square footage needed for the finished parts, then you add a percentage to figure out how much material you actually need to buy.
A good starting point for most hardwood projects is a waste factor of 15% to 20%. If you're working with highly figured wood or complex angled cuts, that number could easily jump to 30% or more.
Let's run through a quick example.
Imagine a small table project requires exactly 20 board feet (BF) of walnut for the final, finished parts.
- Net Material Needed: 20 BF
- Apply Waste Factor (20%): 20 BF * 0.20 = 4 BF
- Total Material to Purchase: 20 BF + 4 BF = 24 BF
If that walnut costs $12 per board foot, that seemingly small 20% waste factor adds a very real $48 to your material costs. When you spread that across multiple projects over a year, it becomes a significant number. By tracking these details meticulously, you ensure your price reflects the true cost of bringing a piece to life.
Tracking Your True Labor and Machine Time
Once you’ve nailed down your material costs, it's time to tackle the next big variable: labor. In a custom woodworking shop, your time and your team's skill are easily your most valuable assets. They're also the most common place where profits quietly leak away.
Just picking an hourly rate that "feels right" is a surefire way to undercharge. To get this right, you have to figure out what every hour spent in the shop truly costs your business. It's a number that goes way beyond a simple wage.
Calculating Your Fully-Burdened Labor Rate
The key is to calculate a "fully-burdened" labor rate. This is an all-in number that includes not just the check you write to an employee (or yourself), but all the other real costs that come with having someone on the payroll.
Think about all the expenses tied directly to having a person on your team:
- Base Wages: The straightforward hourly pay.
- Payroll Taxes: Social Security, Medicare, and unemployment taxes (both federal and state).
- Benefits: Health insurance, retirement plans, or paid time off, if you offer them.
- Workers' Comp: A non-negotiable cost for protecting your crew and your business.
Ignoring these "extras" is a huge financial mistake. Payroll taxes and benefits can easily tack on an extra 25% to 40% to a base wage. That $20/hour shop hand might actually be costing you closer to $28/hour. That $8 difference is pure profit if you bill for it, and a straight loss if you don't.
You Have to Track Every Minute
With your true labor rate in hand, the next job is to track where every minute of that expensive time is going. And I mean every minute.
So many woodworkers fall into the trap of only tracking the "fun stuff"—the time spent actually cutting, assembling, and finishing. But what about all the time spent on the less glamorous but equally essential tasks?
- Material Prep: Driving to the lumberyard or unloading a delivery.
- Milling: Time spent at the jointer and planer turning rough stock into usable boards.
- Setup Time: Dialing in the table saw fence, changing router bits, or creating a jig.
- Shop Cleanup: Sweeping up, emptying the dust collector, and putting tools away.
All of this is productive time that belongs on a client's bill. A simple timesheet or a shop app can be a game-changer here. After a few projects, you'll stop guessing how long things take and start knowing. That knowledge makes every future quote faster and far more profitable.
By not tracking the 'in-between' time—like machine setup, blade changes, and cleanup—you are essentially giving away your most valuable resource for free. This untracked time can easily add up to several hours on a complex project.
Factoring in Machine-Specific Costs
Your machines aren't free, and they don't run on air. Every piece of major equipment has an operating cost that goes beyond its electricity bill. You have to account for the initial purchase price, ongoing maintenance, and its eventual replacement.
For big-ticket or high-use machines like a CNC router or a wide-belt sander, it’s smart to calculate a separate, machine-specific hourly rate. This gives you a much sharper pencil when quoting machine-heavy jobs.
Here’s a quick way to figure out an hourly machine rate:
- Estimate Total Lifespan Hours: Take a realistic guess at the machine’s useful operational life. A workhorse CNC might give you 10,000 hours.
- Calculate Total Lifetime Cost: Add the purchase price to all the maintenance you expect to do (blades, bits, belts, repairs). Let's say a $25,000 CNC needs $5,000 in upkeep over its life, for a total cost of $30,000.
- Divide Cost by Hours: Now, just divide the total cost by the hours. In our example, that’s $30,000 / 10,000 hours = $3.00 per hour.
Now, when you quote a job that needs five hours of CNC time, you can confidently add the operator's labor plus an extra $15 (5 hours x $3/hour) to cover the machine's cost. This simple step ensures every piece of equipment is paying its own way.
For shops looking to pull all of this together automatically, exploring the features of a system like TimberCloud can make a world of difference. It helps integrate material, labor, and machine costs into quotes that are both fast and accurate. By moving away from guesswork and toward data-backed numbers, you gain total control over your project profitability.
Uncovering Your Workshop's Overhead Costs
You've meticulously tracked your materials and labor, but there's one last piece to the puzzle of figuring out what a product really costs you to make: overhead. These are the silent, relentless expenses that keep your shop running. If you ignore them, you can look profitable on paper but still watch your bank account shrink every month.
Think of overhead as the cost of just having the doors open, the lights on, and the tools ready to go, whether you’re building one cabinet or twenty. These are all the necessary expenses that aren't directly tied to a specific project.
Nailing Down Your Indirect Costs
First things first, you need a complete list of every single indirect cost your workshop has. The best way to do this is to grab your bank and credit card statements from the last few months and be brutally honest with yourself. Nothing is too small to list.
Your overhead list will probably include things like:
- Shop Rent or Mortgage: The cost of the physical space you work in.
- Utilities: Electricity, gas, water, and internet bills.
- Insurance: Liability, property, and any other business policies you hold.
- Tool Depreciation and Maintenance: The value your tools lose over time, plus the day-to-day cost of blades, belts, and repairs.
- Software Subscriptions: Your design software (like SketchUp or Fusion 360), accounting software, and any project management tools.
- Administrative Time: All those hours you spend quoting, invoicing, and talking to clients—time that isn't billable to a specific job but is essential to the business.
This systematic approach isn't just for small shops; it's exactly what large-scale manufacturers do. They often use a standardized method called Enterprise Product Costing (EPC) to integrate cost management across the entire business for accuracy and transparency. Major companies rely on having consistent cost data to manage production and stay profitable. You can discover more insights about this global costing approach and see how it helps businesses thrive.
This example from FACTON's EPC software shows a clear breakdown of costs, which is crucial for making smart business decisions.
The screenshot really drives home the importance of having a single source of truth for all your cost data, from materials to overhead, to get a complete financial picture.
A Simple Method to Allocate Overhead
Once you have a grand total for your monthly overhead, you need a fair way to apply a portion of it to every job that leaves your shop. The most straightforward method is to allocate it based on your direct labor hours.
Here’s how it works in practice.
Let's say after adding everything up, your total monthly workshop overhead comes out to $5,000. During that same month, you and your team logged a total of 500 billable, direct labor hours on projects.
- Calculate Your Overhead Rate: Just divide your total monthly overhead by your total monthly direct labor hours.
- $5,000 / 500 hours = $10 per hour
This $10/hour is your overhead allocation rate. It’s the magic number you need to add to your costs to ensure every project pays its fair share of the bills.
If your fully-burdened labor rate is $35 per hour, you should now be billing that labor at $45 per hour ($35 labor + $10 overhead). This simple addition ensures every hour worked is not just paying for the person, but also for the workshop they're standing in.
By baking this overhead rate directly into your labor calculation, you guarantee that every quote you send out is contributing to keeping the lights on and the business healthy.
Review and Adjust Your Numbers Regularly
Finally, remember that your overhead costs aren't set in stone. Your rent might go up, your insurance premium could change, or you might add a new software subscription. Because of this, it's absolutely vital to review and recalculate your overhead rate at least quarterly, if not more often.
Staying on top of these figures prevents you from slowly undercharging as your expenses creep up over time. This regular financial check-up is a hallmark of a well-run business and is central to accurately calculating your product costs year after year.
Turning Your Costs Into a Winning Quote
You’ve done the hard work of tracking down every cost—materials, labor, and overhead. Now you have the complete financial story of your product. The final, and arguably most critical, step is turning that story into a price for your customer. This quote needs to do more than just cover your expenses; it has to secure a healthy profit to keep your business thriving.
This is where things can get a little fuzzy, especially with two terms that sound similar but are worlds apart: markup and margin.
Choosing Between Markup and Margin
Both markup and margin are tools to set your final price, but they approach profitability from opposite ends of the equation. Getting this right is fundamental to making smart pricing decisions.
- Markup is the percentage you add to your cost to get the selling price. It’s all about what you’re putting in.
- Margin is the percentage of the final selling price that is pure profit. It’s a measure of what you get to keep from the revenue.
Let's break it down. Say a custom cabinet costs you $1,000 in total to produce. If you apply a 50% markup, you simply add $500 to your cost, making the final price $1,500. Simple enough.
But here's the catch: that $500 profit is only 33.3% of the $1,500 selling price. That's your margin. A small difference in terminology can make a huge difference to your bottom line.
Key Takeaway: Most seasoned business owners think in terms of margin. It gives you a much clearer picture of your actual profitability relative to sales. When you hear financial experts talking about a company's "profit margin," this is what they mean—the slice of every dollar in sales that becomes profit.
So, which one is for you? Markup is quick and easy for pricing a job when your costs are clear. But if you're serious about hitting specific profitability goals and ensuring long-term business health, focusing on a target profit margin is the way to go.
This simple diagram shows how all your costs must be captured before you can add your profit with any real confidence.
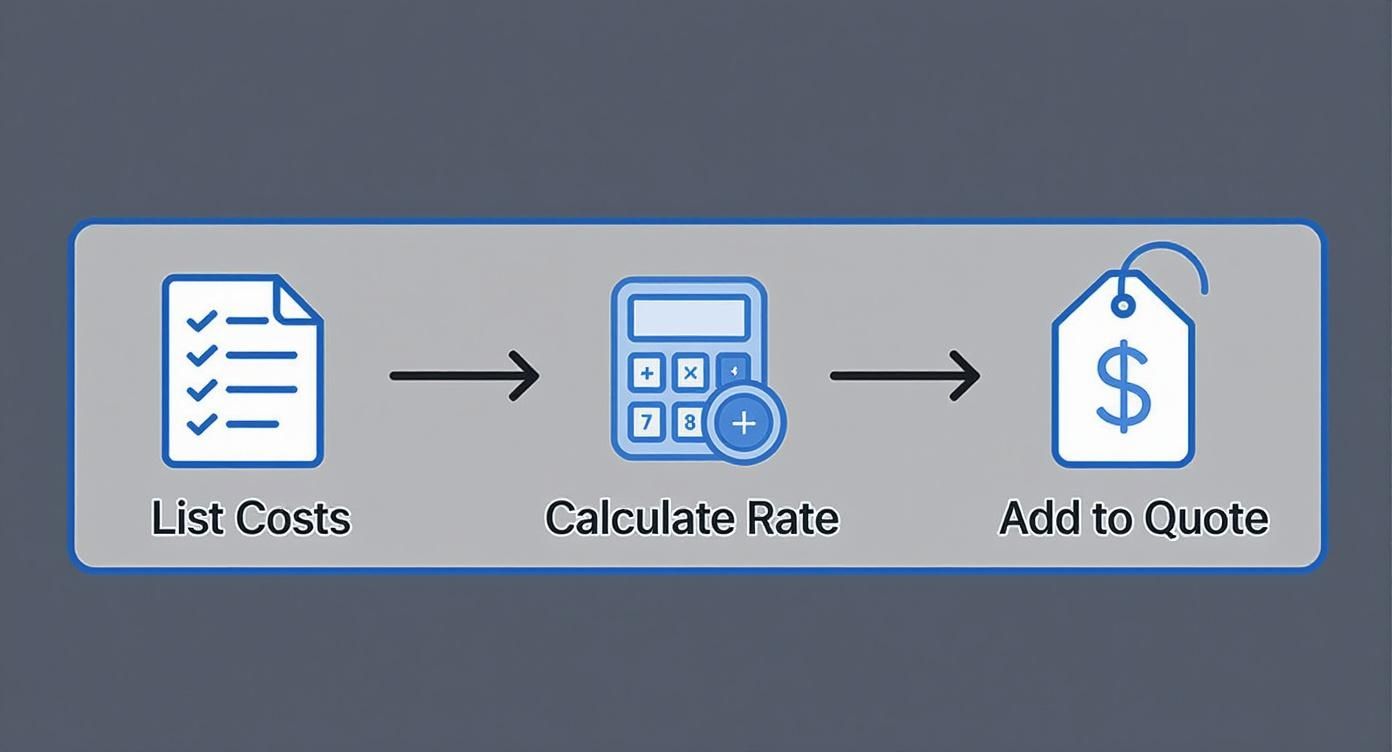
As you can see, a final quote is only as solid as the cost data it’s built on.
Setting Your Strategic Profit Target
The percentage you choose for your margin or markup isn't just a number you pull out of thin air. It’s a strategic decision. For custom woodworking, a gross profit margin in the 30-50% range is a solid target, but you’ll want to adjust it based on the specifics of the job.
Here are a few things to think about when setting your profit:
- Project Complexity: A one-of-a-kind, intricate build deserves a higher margin than a straightforward, repeatable job. Your skill and attention to detail are valuable.
- Market Position: Are you known as the premium, go-to shop in your area, or are you competing more on price? Your margin should reflect the value and brand you've built.
- Client Relationship: It's often smart business to offer slightly better pricing to a long-term, high-volume client compared to a one-off project.
Beyond these traditional methods, some shops are getting more analytical. They use sales and marketing data to fine-tune their pricing. For instance, if you know a $5,000 marketing campaign with an average cost-per-click of $1 gets you 5,000 website visits, and your conversion rate is 5%, you can anticipate 250 sales. This kind of data allows for much more precise pricing strategies that ensure marketing costs are covered.
A Worked Example The Custom Cabinet
Let’s put all these pieces together and build a complete quote for our custom cabinet example. This table walks through how each cost element stacks up to create the final client price.
Complete Product Cost and Quote Calculation Example
| Cost Element | Calculation/Notes | Cost |
|---|---|---|
| Direct Materials | Walnut lumber, plywood, hardware, and consumables | $450 |
| Labor (15 hours) | 15 hours @ $35/hour (fully-burdened rate) | $525 |
| Overhead (15 hours) | 15 hours @ $10/hour (overhead allocation rate) | $150 |
| Total Production Cost | Sum of Materials, Labor, and Overhead | $1,125 |
| Target Profit Margin | Applying a 40% target margin to the total cost | $750 |
| Client Price | ($1,125 / (1 - 0.40)) | $1,875 |
The formula for the client price ensures that your $750 profit is exactly 40% of the final $1,875 price, hitting your margin target perfectly.
Once you have your costs nailed down, the next level of insight comes from understanding how each job contributes to your overall business health. To dive deeper into this, you can explore the Contribution Margin Calculation to make even more informed decisions.
Finally, always remember to professionally itemize other direct costs like shipping, crating, or installation on your quote. Listing these separately builds trust and gives the client a clear understanding of where their money is going. By following a structured process like this, you can use tools like those on the TimberCloud pricing platform to automate your quoting, making sure every price you send out is fast, accurate, and profitable.
Protecting the Price You Just Calculated
Getting from cost to price is only half the job — the other half is defending that price in the real world. Three rules keep quotes profitable.
First, never discount casually: on a 30%-margin job, a 20% discount hands away two-thirds of your profit. If you run promotions, price them from margin math rather than gut feel. Second, break out one-time fees: custom CNC programming or jig-building for an arched door belongs as a separate setup line rather than baked into the unit price — it keeps repeat orders priced correctly and shows clients where the money goes. Third, put your prices on a schedule: review twice a year at minimum, and reprice immediately when a core material like sheet goods or walnut jumps 5–10%.
Shipping and sales tax deserve the same rigor. Quote them explicitly rather than absorbing them, or they become an invisible discount on every job.
At TimberCloud, Inc., we build tools to help you master these numbers, connecting your sales, engineering, and shop floor to improve accuracy and margins. Learn more about how TimberCloud can automate your quoting and production process.
Frequently asked questions
Check material costs on every quote — lumber, hardware, and finish can move within weeks. Review labor and overhead rates quarterly, or twice a year at the absolute minimum, and reprice immediately when a core material jumps 5–10%. Waiting for an annual review means every job in between ships at last year’s margins.
List them as a separate line item on the quote instead of hiding them in the unit price. Clients see transparent pricing, and repeat runs of the same design get priced correctly without carrying a setup charge they no longer incur.
Underestimating or ignoring shop overhead. Lumber and bench time are easy to see; rent, electricity, blade sharpening, insurance, and software are not, and they have to be built into every price. The close second is failing to account for waste material and non-billable time such as machine setup, cleanup, and client emails.
A healthy gross margin on custom work — what remains after direct production costs — typically lands between 30% and 50%. Net margin, after all business expenses, should be somewhere around 10% to 20% for a sustainable shop. Find your break-even point first, then set a margin that lets you reinvest and pay yourself properly.
Generally no. A line-item breakdown invites haggling over individual components and devalues the expertise you are selling. Give an all-inclusive project price, then build confidence by describing what is included at a higher level — solid walnut construction, soft-close hardware, a hand-rubbed multi-coat finish, delivery and installation.
More than the headline number. On a job priced at a 30% margin, a 20% discount surrenders roughly two-thirds of the profit on that job. Discounts should be calculated from your margin, not applied to the sticker price and hoped for.
Topics
TimberCloud Team
Content Team
The TimberCloud team is dedicated to helping manufacturers streamline their operations with intelligent software solutions.